Showing posts with label product reviews. Show all posts

Wednesday, February 2, 2011

Products I Love for My Kids Part 3

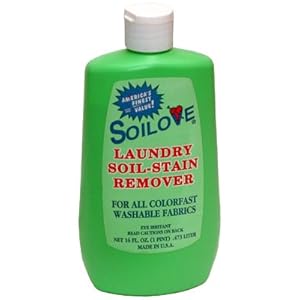
1.) Soilove

SoiloveI don't know what it's made of but by the smell of it, it is not organic or fancy or anything that people love to use.  It is however really inexpensive and really effective.  You can find this at the 99 cent store or the grocery store for under $2.  It is one of the only things that I have found works on baby poop (you know the absurdly yellow stuff that blows out of their diaper on so many cute clothes for the first 5 months.)   Other than this product the only thing I have found that works is laying the offending stain in the sun before washing it and sometimes that is just not convenient.

So instead I squirt some of this on the stain immediately and wash as soon as I can and IT WORKS so I don't ask too many questions about how or why.  I am just happy that it does the job.

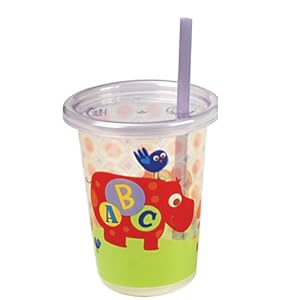
2.) Take N Toss Straw cups and sippy cups.

The First Years/Learning Curve ABC Fun Take & Toss Straw Cup, 3 Pack, Colors May Vary 
 I really like the straw cups with a disposable bendy straw instead of the actual straw.  Those plastic straws are nuts to clean.  My daughter never used a bottle and went straight into sippys and straws.

3.) Sterlite Small Storage containers
Medium Nesting ShowOffs™
These come in several sizes and are great for holding toy sets or small toys that don't come with a container.  They are stackable and easy for my toddler to carry and open/close.  I believe there are different brands (maybe Rubbermaid) that have similar containers.  The parts that make this great are: the see through box so you know what's in it, the locking top so things don't spill out if its dropped or knocked over, the handle on top so its easily portable around the house, and of course the ability to stack in a closet or bookshelf. 

Thursday, November 18, 2010

My Favorite Breastfeeding Items

1.) Lansinoh Disposable Nursing Pads


 These are my favorite nursing pads because they are thin, contoured and really absorbent.  They also don't leak through the backing material.  I have tried several brands and even the cloth kind that are washable and some are okay, but these are great.  I use them mostly at night when I am going longer between feeding and am more likely to leak.  These are also great during the first month when your supply is not regular yet and you get engorged.  If I wasn't so frugal I would use these all the time, but instead I buy a cheaper one for the day time and when I am at home and I use these for when I REALLY want to make sure I don't leak (holidays, outings etc) and at night.

2.) A nursing pillow

I have tried the Boppy and My Brest Friend brands. Both in my opinion are most useful for the first couple months of nursing.

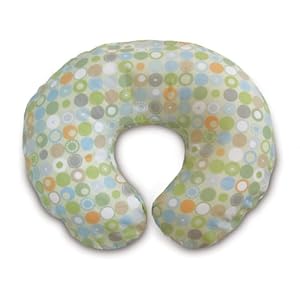
Boppy

Boppy Nursing Pillow with Slipcover, Lots of Dots
 Pros: Its easy to use just slip it on and off when you need to.  It has multiple uses such as letting the baby rest on it, tummy time, and a prop up pillow for when they start to sit.  Also, it is a great pillow for mommy to sit on during the postpartum recovery.  The covers are easy to wash and change and there are many options to match your taste.
Cons: For tall people it still might not get the baby at the right height to nurse without an arm under it.  No back support and it will shift when you move.


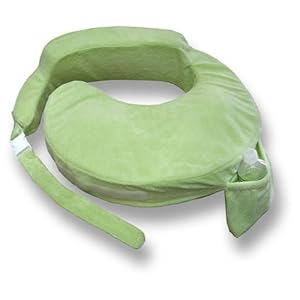
My Brest Friend
My Brest Friend Deluxe Pillow, Light Green

 Pros: It has a back support pillow and the part the baby rests on has raised sections of foam to bring the head higher up.  There is a pocket in the cover to hold any little things you may need while nursing so you don't have to go looking for them.  The body is adjustable and secure.  It has an easy clip feature so you can take it on and off.  It is very comfortable when on and I felt very secure and more hands free with this than with the Boppy.

Cons: It is bulkier than the Boppy and not as multi-functional (so far as I have seen.)  The cover is hard to get on and off to clean.  Because of the adjustable waist, it is not really able to be used by Daddy for baby holding support or by others who may be holding the baby.


3.) Nursing Bras

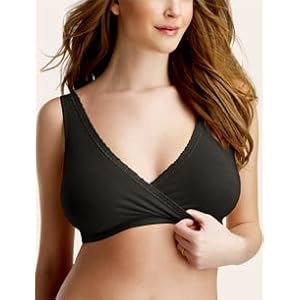
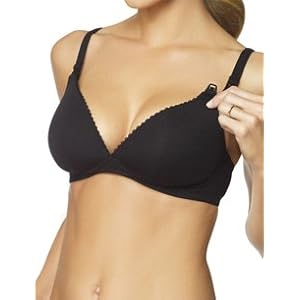
Motherhood Maternity: Light Support Nursing Sleep Bra First, no that is not me, I am not that brave.  But this is a sleep/lounge nursing bra.  I know there are women who feel this is not needed, but I am not one of them.  I do not like to leak milk on my pajamas and sheets between night feedings and I need something to hold in my nursing pads.  I would recommend two of these for night time, as well as a comfy, around the house option.  Also there are other types of sleeping bras but I like the cross front for ease of access when I'm half asleep rather than a clip on the strap.


Motherhood Maternity: Medium Support Padded Cup No Wire Nursing Bra

Motherhood Maternity: Medium Support Padded Cup No Wire Nursing Bra

I like this one because it is like a T-shirt bra with a smooth cup.  It is supportive and easy to use.  Also, it is lined and adds an extra layer of leak protection (which has really come in handy when I've forgotten pads a few times.) Again, I would get at least 2 of these to have another while washing.


4.) Nursing Friendly Clothing.

This is more of a category than a particular product.  Stretchy camisoles in neutral (black, gray, white, etc) are great under shirts to help with concealing skin if you lift up your shirt to nurse.  They are also great while wearing low V neck shirts or button up shirts to allow more coverage but quick and easy access.  I like nursing tanks with built in bra's because they offer more support and coverage under clothes (and help smooth out my belly a little, lol) and can also double as a light weight bra option if it has a built in bra. As stated above, I also prefer V neck or low scoop neck T-shirts for easy access.  Lifting my shirt, even with a nursing cover, exposes stretch marks and more skin than I'm comfortable with.  Pulling a shirt down allows you to be quick , discreet, and even feed in a front carrier like an Ergo :o).

5.) Nursing Cover

You can make these pretty easily, but there are some nice ones you can buy for $15-$30 if you don't sew or don't have the time/energy to deal with sewing one.  For my first pregnancy, my mom made me some covers that worked excellently.  For this one, I found a deal on Babysteals.com and got a new one.  I use it whenever I'm out and nursing and whenever someone is over my house and I have to nurse.  The downside is that as your baby gets older they are less likely to accept the cover over their heads and more likely to yank it off exposing you.  At that point, I either go to a more private place or shove the sides of the cover under and around the baby so I won't offer a free peep show. (People who are lactivists, I am not ashamed of breastfeeding and I know its natural and should not be viewed the same as lewd exposure.  However, I personally am more comfortable being covered so please don't comment about my rights while feeding. :o)

Tuesday, October 19, 2010

30 Day Shred - Before and After Photos

I tried to crop the pictures to as close to the Before day as I could and took the color out just so any contrast could be seen. Please ignore the stretch marks and know that I am still a work in progress. :oP  I also did not include a straight on belly shot because my stretchmarks make me too self conscious for that, give me credit for being brave enough to post what's here. LOL
BEFORE: Front view
AFTER: Front View
BEFORE: Back View Arms
AFTER: Back View Arms
BEFORE: Back View
AFTER: Back View
BEFORE: Side View (my least favorite)
AFTER: Side View

Sunday, October 17, 2010

30 Day Shred Finale

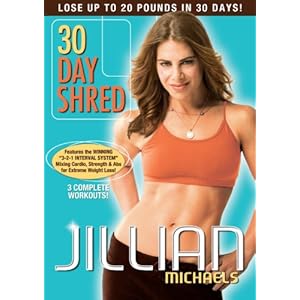
Jillian Michaels - 30 Day Shred

Level 3 Overview:

Strength exercises
1.) Walking Planks**
2.) "Supermans"
3.) Dumbbell Clean with Deep squat**
4.) Jumping Lunges**
5.) Plank Row with Leg lift**
6.) Walking Push ups**


Cardio exercises
1.) Mountain Climbers**
2.) Sumo Squat w/ plie jump
3.) Shadow Boxing with dumbbells
4.) Butt Kickers and Jumping Jacks with Dumbbells
5.) Jumping Squats**
6.) "Rock Star" Jumps**


Ab exercises
1.) Pike Crunches**
2.) Scissor Crunches**
3.) Sit Ups**
4.) Side/Oblique Crunches**

**Indicates an easier option available


Day 29:

Level 3:  I added more of the hard versions of the exercises today.  I am motivated at this point just to get the 30 Days over and see the results in the end.

Day 30

Level 3: Shaky muscles and I needed to workout on a towel so sweat wouldn't drip on the floor.  Lovely.  I'm still going because this is still only my 26th day of actual exercise due to taking 1 day off a week for 4 weeks.


Day 31

Level 3: 27th workout day.


Day 32

Level 3: 28th workout day.


Day 33:

Day Off and I needed it.

Day 34

Level 3: 29th workout day. I was already tired from a long day, its taking a lot of will and peer pressure (from this blog and from my husband) to finish the 30 days.  Part of me thinks "Ah you're close enough" but I know close is not done.  I'm still not great on push ups and my ankle is better but not 100% so I am still doing easy versions of a few exercises.

Day 35

Level 3: 30th workout day!!!!  Again I faced the reluctance to do it for no other reason than because I don't feel like it.  My brother in law just did a whole marathon today and I don't want to work out for less than half an hour, makes me feel so lazy. lol.

Results: Workout 6 days a week.  No change in diet or other activity.

Non Measurable Observations:  My jeans are looser. Clothing is fitting better.  I can see a big difference personally in my mid-section and some difference in my rear end.  I also notice a difference in my ability to perform the exercises.  When I started I peeked at level 3 and thought "No Way! I will probably never even try that level."  But now I'm doing it and it gets easier daily.  My endurance is up and I can tell I am stronger in certain areas.

Measurement Changes:
DAY 1:   Waist = 33"; Belly Button Area = 38.5 " (ewww); Hips = 42"; Left Thigh = 24.5" Right Thigh = 25"
DAY 30: Waist = 32" ; Belly Button Area = 35"  ; Hips = 41" ; L. Thigh = 24"; R. Thigh = 24.5"

Total Inches Lost = 6.5"
Approximate Weight Lost = 4-5 lbs (I wasn't watching closely at the beginning so this is a close estimate from where I started until today.)


In my opinion, this is a great workout to kick start your body into more exercise or to change up your routine.  For me it was a major change to work out at all and my postpartum body was way out of shape (and still needs a lot of work.)  As you can see the overall results aren't dramatic (no 20 lb weight loss and 4 dress sizes,) but there are differences.  I think the program recharged my abs and brought them back in line with the rest of my body.  I think, if I continue with this and some more cardio I can meet more of my goals and get in better shape.  I would definitely recommend this DVD to anyone who wants to try it because it really makes you work and is not a huge daily time commitment.  Feel free to ask questions in the comment section about the workout and I'll answer them if I can.  I am debating whether I will post Before and After photos. It depends on how brave I am this week and if I have time to take some.

Monday, October 11, 2010

30 Day Shred Week 4

Jillian Michaels - 30 Day Shred

Day 22: 

Level 2: I'm having some ankle issues and had to cut back on the jumping today.

Day 23:

Level 3!!!  Still having the ankle issues and still cut back on the jumping but I did Level 3 on mostly the easier versions.  I can already feel that I'm going to be sore tomorrow.

Day 24:

Level 3: I'm sore today in several places that Level's 1 & 2 didn't effect.  I guess that's good, right?  I still did the easier versions.  My ankle is still bothering me.

Day 25:

Level 3: Did about 50-60% with easy version.  My ankle is really not into a few of the moves Butt Kickers and jumping lunges are two of them I just can't do with out serious pain.  I must have strained something.  Lesson learned: Don't do 30 Day Shred in bare feet, you need ankle support. Also, I am realizing that my push up muscles are my weakest for whatever reason but my shoulders are pretty strong in every other exercise and I am using heavier weights for some of those.

Day 26:

Level 3: It's still hard to get through some exercises and I am always happy when she counts down to 5, 4, 3,2, 1.  Relief.

Day 27:

Day off, went to the beach.


Day 28:

Level 3: I will write an overview/summary of level 3 in my next post.

Sunday, October 3, 2010

30 Day Shred Week 3

Jillian Michaels - 30 Day Shred

Day 15:

Level 2 today slightly easy version because my bum shoulder and neck muscles were not feeling okay.   Thank God for A/C because I would not workout without it in the 105 degree temperatures we are having.

Day 16:

Level 2. Worked out with my 2 year old and it was distracting but interesting.  I won't be doing that much anymore.  :o)


Day 17:

Level 2: Barely got the workout in after the kids were in bed.  It's still hard especially the last 1/3.

Day 18:

Today was my chosen break day.

Day 19:

Still on Level 2 and afraid to try Level 3, though I did watch it to preview the pain.

Day 20:

Level 2: Did mostly the hard version of everything.

Day 21:

 Level 2: Its been a long day.  I might be brave enough to try Level 3 tomorrow. We'll see...

Sunday, September 26, 2010

30 Day Shred Week 2

Jillian Michaels - 30 Day Shred


Level 2 Overview

The "easy" version of each exercise still kills.  There is a 2 minute warm up and cool down with this level too. Though there is only 1 "cardio" section per rotation, most of the other exercises feel like cardio too.  Much more sweat involved in this level.


Strength Moves:
Walking Push Up (easy option: instead of doing the push up at the end, hold a plank position)
Squat Row with Weights (easy option: don't squat as low)
Static Lunge with Row (easy option: don't lunge as low)
Pendulum Lunges and Hammer curls (easy option: don't lunge as low)
Leg Extension with Shoulder Press (easy option: less extension)
Chair Squat with "V fly" (easy option: don't squat as low)

Cardio Moves:
Jogging in place with high knees (easy option: lower knees)
Squat Thrusts (easy option: Plank pose with alternating forward step touches)
Obliques Twist (no easy option)
"Skaters" (easy option: less of a leap more like a step touch)
Plank Jacks (easy option: plank with a side step touch alternating)
Double jump rope (easy option: single)


Abs Moves:
Crunch with single leg lift (easy option: keep leg higher instead of lowering it to 2 in. off the floor)
Chest weights with double leg lift (Weights held up at full chest press legs straight out and lifted straight up)
Crunch with knee lift
Plank Twists (No easy option and its so HARD)


Day 8: 

My formerly awesome sleeper/napper has decided to work against me.  He woke up twice during the half hour I was working out.  But I did it anyway, just had to stop which is not really the point of her workouts.  I went back to level 1 today so I wouldn't have to focus on a new routine but I did try to do the harder versions of the exercises instead of the easier versions.  

Day 9:

Another frustrating day in nap land but I did level 1 again, finishing while my 4 month old curiously watched me from the sidelines.

Day 10:

Yay! The kids stayed asleep today and I did Level 2.  I'm sticking with this level for at least a week or more.  I did 1/2-2/3 of the exercises following the "easy" example chick.  At the end, I was so sweaty my glasses were fogging up.  Sexy right? LOL

Day 11:

Level 2 today.  There is a point in this level where she says "I want you to feel like you are going to die."  Seriously, she says that as motivation.  As if the intense desire to collapse is a good thing. 

Day 12:

I decided Fridays are my days off from Shreding.  So today is another break day for me. Although, I ended up feeling like I worked out after a long hot day with the kids.

Day 13:

Level 2 again.  I am doing at least 1/2 or more of the exercises without resorting to the "easy" version and some exercises don't really have an easy option.

Day 14:

Level 2 again.  So tired, want to lay on the floor, but at least week 2 is done.

RESULTS SO FAR:
Week 2, Exercising 6 days a week, no change in diet or other activities.

I'm really surprised.  I lost inches the first week, and by week 2 I could see a serious difference.  At this point, my biggest change is in my belly.  Not my waist, but the area right around my belly button.  After 2 kids and no workouts the muscles were just not in the right place anymore.  I have lost 2.5 inches so far just there alone.  Also, the workouts get easier every couple days.  I can tell when things hurt less and then I know I should probably try the harder one (though I really don't want to).  I really don't look forward to working out at all, but I am really motivated by the changes I'm seeing thus far.
Sunday, September 19, 2010

30 Day Shred Week 1

Jillian Michaels - 30 Day Shred
Level 1 Overview

I've read other places that people consider this level an intermediate as opposed to a "beginner".  If you have injuries, bad knees, etc. not even this level will be okay for you.  The workout consists of cardio, strength and ab work.  In the cardio sections, there are jumping jacks, punching while in a squat (boxing), running in place (kick your butt), and imaginary jump rope.  In the strength sections, there are push ups, lunges, squats, and flies with weights.  The ab section includes crunches, oblique crunches, bicycle crunches and leg lifts.

Day 1:

  I thought, 20 minutes...no problem.  How hard can it be?

HA! I was schooled.  I did level 1 of the shred and by 1/2 way through I was tired and hurting in places that hadn't been worked out since before by 1st pregnancy (or longer).  Jillian was not as mean as I thought she would be but she doesn't stop for mid way stretches or breaks because its only 20 minutes.  Every exercise works more than one part and they are not hard to learn like a big aerobic dance workout.  The exercises burned so they must be working.
As the 2nd half wore on, I found myself cussing to myself (kids are napping) and just wanting it to stop.  My muscles are shaking and I am sweating a ton.  Lord I hope I don't wimp out on this.  I really want to do it the whole way through.

Day 2:
 Owwww...I'm sore. (whiny tone)

But I did it even though my 4 month old woke up right near the end, I finished.  Still on Level 1.

Day 3:
Still sore but not worse than yesterday.  I had a hard time getting to the workout because my 4 month old kept waking up from his usual long nap.  So my husband tried it with me tonight.  He works out regularly and is in much better shape than I am but he still worked up a sweat with level 1.

Day 4:
Still sore. Mostly in my calves, quads, and shoulders/chest.  The hardest thing is that I am sore because of the workout and working out the same way is painful.  I am not one to happily step into causing myself pain.  I keep hearing it starts getting better around now...we'll see. My husband did TDS with me again. :o)

I am having a lot of trouble near the end of certain sets because my muscles are so tired and shaky.  Fun stuff.

Day 5:
I took a day off here because I had no time during the day and no energy that night.

Day 6: 
Still sore.  My legs didn't want to do some of the things I was asking them to do.  But I got it done.

Day 7:
I don't want to work out but I'm going to anyway....Does this ever get easier?

I did Level 2 out of curiosity. Seriously a new Level of difficulty.  She seems to like the plank position more at this level.  Ouch, can't wait to see what's sore tomorrow.

Sunday, August 29, 2010

Products I Love for My Kids Part 2

1.) Crane brand Cool Mist Humidifier


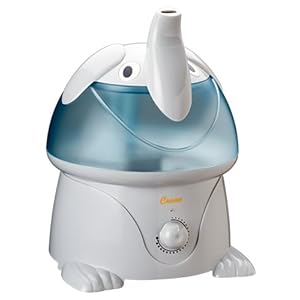
Crane Adorable 1 Gallon Cool Mist Humidifier


This is one of those items that you know you will need but some how no one gets it for your baby shower.  Its not "gifty" enough or "cutesy" enough I guess.  But you will need it and when you do you will not want to have to go searching for one during cold season.

I have not tried out a bunch of these, just this one but I like it for several reasons.  1.) It is decorative (sort of) and cute.  2.) The trunk helps to direct the flow of the vapor. 3.) It is reasonably priced at around $35, in my opinion, for an item that will be used several times throughout the baby, toddler, and preschool years and maybe beyond.  Also, if you have a child with eczema or dry skin humidifiers are recommended and might be used for a whole season.

2.) A Basic Play Yard

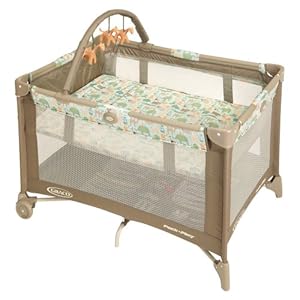
Graco Pack n Play - Animal Time
I know there are AWESOME play yards with various features and attachments.  Here is the thing, I have huge kids.   All of those extra attachments would be useful for about 1-2 months for me.  Seeing that those ultra cool, decorative, battery powered playyards can run into the $200 range, while a basic one runs closer to $60-$70 I am saving over $100 by not getting all the fancy stuff.  Given that play yard sheets cost around $6-$10 bucks each as well (and I would make them if I had the time) the extra saved $ makes me feel less bad about buying a couple nice padded sheets that are super soft.

3.)Baby Medicine syringe.
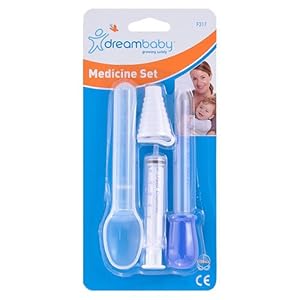
 Baby Child Medicine Set spoon dropper syringe

This comes in a set but the syringe part is the best.   I don't know if this is the brand I get but I find mine at Walmart in the medical section near the thermometers.  Focus on the middle syringe and topper.  That bottle topper fits any sized medicine bottle and does double duty.  First, it makes for easy mess free measurements of the meds.  Second, and this is my favorite part, it allows you to get the meds out without sticking the dropper into the medicine bottle which contaminates the whole bottle with saliva or with whatever illness your baby has.  I want to get several of these syringes for the different types of meds my kids take so I don't have to deal with those dang droppers.  Also the syringe doesn't drip out the medicine like a dropper does so you have more control when getting it in a wiggling kid's mouth.

Products to pass on. Part 1

As I have some favorites I also have some products that haven't worked so well for me.

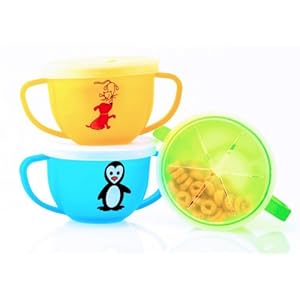
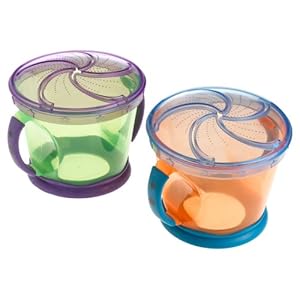
1.) Any snack container that was "spill proof".

If it was meant to trap food in while letting your kid get food out I tried it and my daughter found a way to prove the claims wrong.  The flaps they put on the lids bothered her.  She didn't like the way they felt.  But she still wanted the food.  She would start by shaking it and food would fly out if she shook hard enough or at the right angle. If that didn't work or wasn't fast enough, she would work on prying off the lid. 

Made For Mom Snack Trap, 3 PackMunchkin Two Snack Catchers, Colors May Vary

Let's assume my daughter is just your average monkey of a kid (not the genius I assume she is).  If one kid trying these stack containers out between 10-24 months can do this, I would think there are others out there that can too.  So for $3-$10 that it costs for one of these "magic" containers, its not worth it. 

I got some cute flip top ones from the dollar store and they have worked best because they are easy to get into and easy to close, and I really don't care if they get scratched or dented because they are only $1.


2.)  Teethers

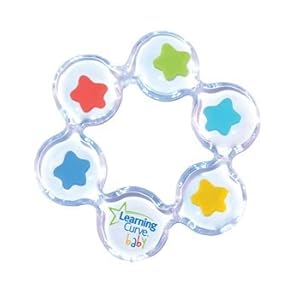
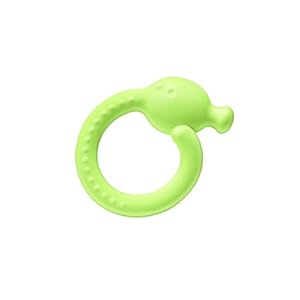
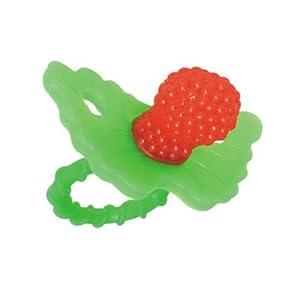
Sadly, I haven't given up the search for the perfect teether.  So far though, everything I have tried has not served its purpose.  Anything specifically meant to be used to chew, gnaw, and drool on, held no interest for my daughter.  She would much rather go after board books, soft training spoons, hair brush handles, medicine droppers (the rubber part), blankets, other toys, and so on.
Learning Curve Floating Stars TeetherPhilips Avent Range Front Teeth, (BPA-Free)Razbaby RaZberry Teether

My 4 month old son is now teething and I have excitedly brought out all the paraphernalia I could find and I have even added to the collection.  I have not given up hope that these will all work for him, but the realistic side of me knows he will probably end up chewing on one of his sisters dolls or on some random household object rather than the wonderfully designed, BPA free thingamabobs that were purchased for the sole purpose of relieving his teething discomfort.

3.) The Infant Car Seat/Carrier

This one isn't really the product's fault at all. I actually love my seat and the stroller it came with.  The problem is one of genetics.  My kids have been above average in size from day 1.  My daughter was born at 8 pounds 13 ounces and my son was 9 pounds 3 ounces.  At that point they already didn't fit in newborn sized clothing and newborn diapers lasted a week.  So the infant car seat that we got with our travel system is supposed to last the baby's first year (in theory anyway.)  The weight limit is 22 lbs and the height limit is 30 inches.  My daughter was 20 lbs at 6 months and my son is on his way to meeting or beating that weight by then.  So we had to invest in a convertable seat for my daughter at around 5  months when their was a sale.  We just did the same for our 4 month old in anticipation of having to change his seat soon.

As for the "carrier" feature. Yeah right, is all I have to say.  Those seats weigh about 8-10 pounds on their own.  Sticking an 8-10 pound baby in with it made it ridiculous to carry.  It got worse when both kids were 15 lbs by 2 months old.  I, for one, am not fond of lugging around almost 25 lbs of awkward weight with a packed diaper bag and a 2 year old in tow.

The good news is about a year after we bought our system companies started making seats with higher limits, but the carrier will still not be convenient what-so-ever if you have a big, heavy baby.  Keep that in mind before spending $200-$300 on a travel system. You will have to invest in a convertible seat that will last up to 65 lbs at some point and it would be good to have a baby carrier like an Ergo or a Beco Butterfly II, which will both last through about 2 years or 35 lbs.

Wednesday, July 28, 2010

Products I Love for my Kids. Part 1.

1). Infant-to-Toddler Rocker by Fisher Price


Enjoy years of use—from birth to 40 lbs!This chair is perfect if you have a baby and a toddler.  If you do, you know that your toddler will want to play with all the toys and equipment that is meant for your new baby.  My 2 year old is over 30 lbs and I could just see the destruction she would cause on another chair or bouncer.  This chair holds up to 40 lbs.  It can be used as a rocker which sits your baby at a good reclining angle or it has a kickstand that lays the chair further back at a great angle for sleeping (at least for the first few months when your baby will sleep in any room anytime.)  The vibrating switch allows me to put my baby in there and he stays happy for a few minutes while I take care of my toddler or get dressed.  If you don't have a lot of space and can't have 5 different pieces of play equipment this chair is nice because it is versatile and will last into toddler-hood

2.) A Backpack instead of a diaper bag.

I know there are certain people who long for those $200 designer bags.  I am not one of them.  I need function and practicality.  With my first baby I had a black messanger bag.  It was adequate but I was frustrated that it would slip off my shoulder while I was lugging my heavy baby around.  When I got pregnant with the second one I knew I wanted a backpack.  I was lucky enough to get one for christmas while I was still pregnant and that helped a ton because my belly was already in the way and a diaper bag would only take up more needed space around me.  I suggest one with two large zipper sections.  You can separate things by child or by purpose.  I use one side for feeding (nursing cover, burp cloth, snacks/food for my toddler etc) and the other side for diapering (changing pad, diapers, change of clothes for each child, etc).  This is also an excellent option if you babywear which will bring me to my next topic.


3.) Baby carriers

If you haven't gotten on this train yet, I highly recommend it.  With my first baby I didn't have a carrier.  My biceps did all the work as my 8 lb 13 oz newborn turned into a 15 lb 2 month old and a 20 lb 5 month old.  I was seriously buff after that first year lugging her around.  She was also a needy, gassy baby and was held and carried most of the day.  That was hard and I wish I would have had known then what I know now.

I have 2 carriers that are the most useful to me at this point. One is a Ring Sling by Sleeping Baby Productions.  Again I did not go for anything fancy just neutral utilitarian and inexpensive though she makes some beautiful slings.  This sling is great for carrying in church and around the house, or anywhere that I won't need to be too active for too long.  It holds my toddler too, though we've done this more for fun than out of need.

black with camel lining in actionMy other go-to carrier is the ERGObaby carrier.  I got mine when babysteals.com had them for about 50% off retail.  Woo Hoo!  I use this at least 4 out of 7 days of the week, much more than my double stroller so far.  My baby sleeps in it when we are at the park, library, grocery store etc.  Without it I would be stuck at home or would be forced to leave him in his infant seat which weighs almost 10 lbs on its own so carrying him in it is no small feat.  If I could afford it I would buy one of these for anyone having a baby.  I already want another on in their Sport or Performance version for the warm weather.  If you are considering a carrier PLEASE ignore the Bjorn and the Snugli (which hold the baby in a crotch dangling position that can harm their hips and spine) and check out the ERGO.

 
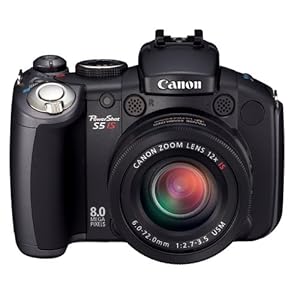
4) Canon PowerShot S5 IS
Canon PowerShot Pro Series S5 IS 8.0MP Digital Camera with 12x Optical Image Stabilized Zoom
Now this is not technically a baby product but is a must have with babies.  We purchased this just before my first was born.  I was adamant that our other camera was inadequate and we would NEED a new one.  This one is not compact but not huge.  I keep it in my backpack/diaper bag usually.  It runs on AA batteries (which is a bummer but if you get one I would suggest to buy rechargeable batteries).  It takes pictures in almost any light very quickly (great for catching those cute faces and action shots.) It also has a high quality video recorder so I can switch quickly between photos and videos if my kids do something brilliant that needs to be filmed.  There are probably newer versions and I would love an even better camera with the same features but one thing I try to tell my friends having kids it to get a camera that takes pictures quickly and takes them indoors well.  If you aren't worried about a little bulk for better pictures get a camera like this. :o)


I will add more products I have found useful as time allows so stay tuned. :o)

LinkWithin

Related Posts Plugin for WordPress, Blogger...