Showing posts with label re-purpose. Show all posts

Thursday, October 20, 2011

Halloween Costume 2011


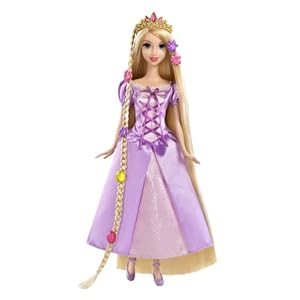
Disney Tangled Featuring Rapunzel Grow and Style Doll
This is the doll she has so it was more modeled after this dress (short sleeved) than the  movie version.

Rapunzel... my version based on Tangled.


Patterns, Materials, Supplies.

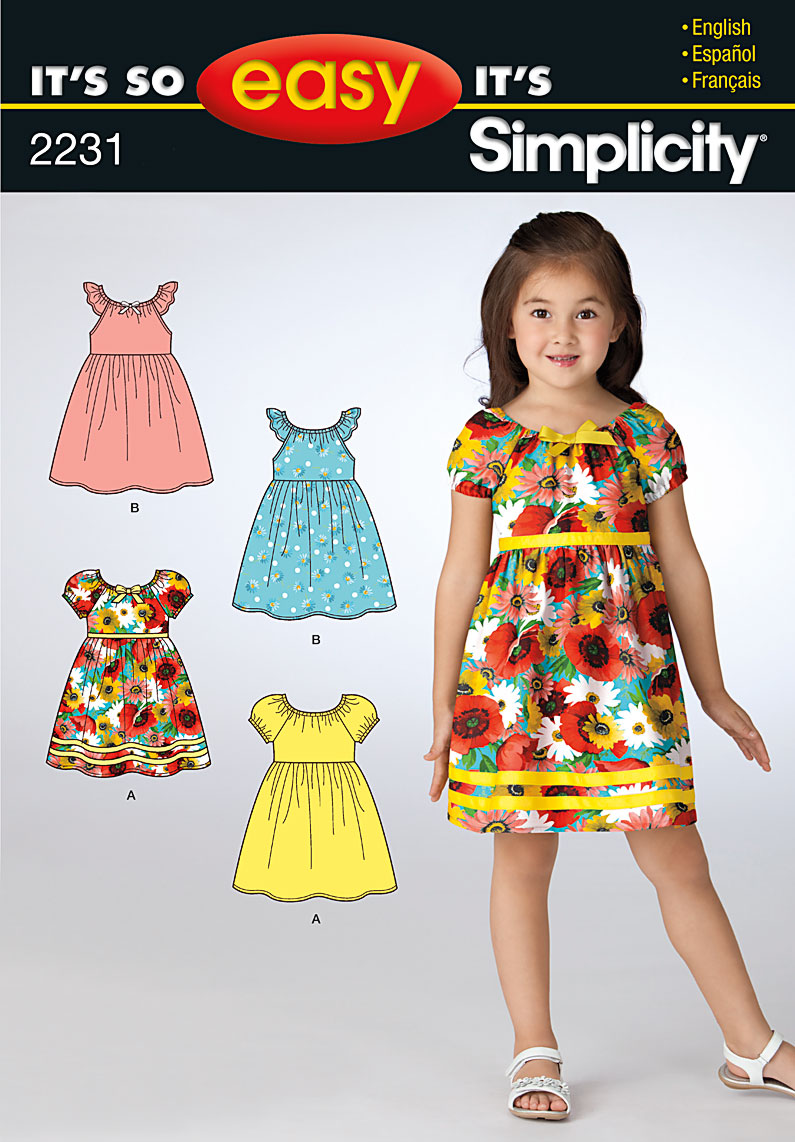
Simplicity Pattern (for top only).  I bought this because it had the top style I wanted and it was really inexpensive.  I also think it is a good simple dress pattern that I could easily use again.
Photo

1 Thrifted adult skirt (Thanks to my mom's good eye at the thrift store.)
Notice the ribbon detail and soft tulle at the hemline...much more work than I would've put into it had I not had this skirt to work with.   

1/2 yard matching purple fabric.
Thread to match
1/4 inch elastic
1 remnant of pink fabric
Contrasting purple satin ribbon (1 inche)
1/4 inch pink ribbon (for bodice detail)
sewing machine
needle
scissors
pins and safety pins
***good to have but not necessary: a bodkin, and a seam gauge

Difficulty Level: Intermediate

Active Time Sewing: Not quite sure.  I worked on and off for 2 weeks during naps and after the kids had gone to sleep and any minutes they would let me.  The bodice took the longest and had the most detail.  I just measured a 6.5 x7" piece and hemmed the edges before centering it on the front of the bodice.  I also added  3 strips of  ribbon to the sleeves before making the casing for the neck elastic.

Once the top was done, I figured out the length I wanted for the skirt and basted the waste to gather it then attached it to the bodice.  I tacked on the criss-crossed ribbon in front after the dress was done and tied a bow at the top.  The ends of the ribbon were coated with some Fray-Check

The next issue I had was with the crotchet section of the skirt that hits about hip level on Isabella.  I didn't want her underwear to show.  After debating other options (wearing shorts/pants, or attaching a bias strip to that section,) I used the 2nd layer of the thrifted skirt and made a simple slip to go under the dress.


My main objective when making the dress was to make it comfortable and as easy as possible.  My daughter will not stand for itchiness (hence the lace left out of the neckline and arm holes.)  Also, I realize the dress is not a duplicate of the movie version.  There are a couple reasons for this.  First, it is still  pretty warm here on Halloween.  During the day it can even get up to 90 degrees some years, so long sleeves were not a good idea and would also be difficult to make and wear.  Second, the skirt had a lot of detail on its own so I didn't want to mess with that by trying to copy the movie version.

Now I'm hoping she will let me convince her to NOT wear the wig (which seems loony, I know) because she gets sweaty quickly and I can see her 3.5 year old brain INSISTING on wearing it only to INSIST on taking it off 10 minutes later. :)  Still I plan to brush the crazy thing and braid it just in case she has her heart set on the blasted thing.  At least I will try to get some good pictures of her in it before she gets uncomfortable.

Thursday, December 23, 2010

Bib from Dad's Shirt.


I got this idea from another blog, but I didn't use a pattern or their tutorial so I don't remember where I saw it.  If you saw something like this somewhere else, I'm not taking credit for the idea, just sharing my version of it.

My husband was getting rid of a shirt that didn't fit him well anymore.  Aside from some wear in areas from age, the shirt was still good and I thought I could make something out of it.  My first thought was a dress for my 2 year old but seeing as how I was swamped with Christmas stuff, I wasn't willing to commit my time to that.

Therefore we have the Shirt Bib.

All I did was get a bib that I liked the shape and size of and use it as a pattern.  I pinned it  to the front of the shirt where it buttoned and cut it with about 1/4 inch seam allowance.  I bought a coordinating hand towel (probably $1.50) and cut out the same pattern.  I stitched the two together (right sides facing each other) and left a 2-3 inch opening to allow me to turn the bib.  Then I top-stitched around the whole thing which closed the opening and helped the bib to "sit" flatter when on.  Because of where I cut the shirt, there was only one button attached so I cut off another one and it helped to keep the two layers from shifting.  I cut some Velcro for the neck and sewed it on.  The whole thing took a couple of days on and off (like 5 minutes here and there) and I think it looks pretty cute. :)

Sorry for the lack of step by step pictures.  I wasn't sure it would work the way I wanted and didn't think to take any pictures as I went.  But its pretty easy I swear.

LinkWithin

Related Posts Plugin for WordPress, Blogger...