Showing posts with label gift ideas. Show all posts

Tuesday, May 17, 2011

Great Idea!

Image Source
I came across this website on a friend's Facebook page.  It is one of those "Why didn't someone think of that sooner?" type sites. 

Take Them A Meal, lets you create a meal schedule for someone in need.  This might be due to illness, a new baby, or some difficult times in their lives.  People can search and sign up for a meal slot so meals are organized.  I would love to use this next time someone I know needs it and will be suggesting it to friends.

Thursday, February 10, 2011

What to Give a Mom

There are ample amounts of holidays and reasons to give a gift to the moms in your life.  Christmas, Valentines Day, Birthdays, Mothers Day, Anniversaries, or just because.  With all of those opportunities, many people wrack their brains trying to think of the next thing to get for their mother, wife, grandma etc.

Well here is a list that I think would help a lot of people who end up saying "I just don't know what to get her."

1.) Time with you:  If you are a child older than 10, you most likely have a "life" of your own.  I am also referring to all adult children no matter how old you are.  Your mothers want to see you and spend time with you.  Unless you are a serious pain in the neck who has shamed the family with atrocities, your mom misses you and wishes she could spend more quality time with you (and even with your spouse and children.)  Give her a "date" with the family.  It can be as simple as picking up dinner and hanging out, or going to a park and having a picnic with her.  Just think about being able to talk to her and give her time to relax with the family.

If you are a husband, a date with you doing something SHE likes or has always wanted to do with you.  If its inexpensive its okay, but it should be focused on her (including letting her know how much you enjoy being with her and spending time with her.)   Its is especially important that you plan it, prepare for it, and deal with all the details (babysitting, place, time)

2.) Time for herself:  This is especially true for mothers with kids at home.  Most moms have to be forced to spend time on themselves.  Pedicures, haircuts, shopping trips (for her not the kids), a nice lunch with friends, time for her hobbies are all things that get put on the end of the list when you have a family.  Think about the moms in your life and what they used to do pre-motherhood or what they have mentioned such as "when I ever have the time I'd love to...".   Sometimes an hour or two to concentrate on anything other than the house, kids, groceries etc. can be refreshing.  Again, it is important that this is done in addition to planning the details (babysitting, timing, dinner afterward so she isn't worried about it etc.)

3.) That thing she asked for: Seriously, the item or things she has been asking for, pointing at, emailing you about over and over.   She has said it, I promise you, and she has said it as bluntly as you can imagine "I REALLY WANT...".  If you haven't heard her or forgot, start sending yourself emails, texts, or saving a "Gift Idea" file for her and every time she mentions that thing/things write it down, set an alarm and save it somewhere for the next time you need to get her a gift.  Don't think it will seem like you weren't thoughtful for getting her what she wanted.  She will be so happy you listened and remembered and that you didn't just run out and grab some random gift to wrap, but got her something she actually wanted.  I'm really, really serious about this one. (AND I'M MOSTLY TALKING TO THE HUSBANDS HERE!)

4.) Something thoughtful:  This is not an easy category but it is a good one.  There are not a lot of specifics here but things to think about (AHEAD OF TIME) that will be super awesome when you have to give a gift.
FOR HUSBANDS: Think back to when you were dating like the first year or so of courtship.  Think about how you would notice things about her.: What her favorites were, things she needed but didn't know she needed, just little things you paid attention to because you actually wanted her to like you.  Try doing that for about a month and you will get some idea(s) that you might never have thought of or that she hasn't even asked for yet. 
FOR YOUNG CHILDREN:  Something sincere telling your mom how thankful you are for her for specific things she does and how she takes care of you (a letter, story, a handmade card, or artwork.)  Also, something from all the children that will capture a memory from that age like a photo book, hand prints, etc (most likely this will require grown up help which will also get a lot of appreciation for Husbands who assist.)
FOR ADULT CHILDREN:  Do something that creates a memory or brings back an old one.  Collect favorite clothes of yours and your siblings and make a quilt, or shadow boxes.  Something that shows a special connection for the two of you in particular.  Something involving the grandchildren is always fun too.
FOR ANYONE:  Think of something she HATES doing (filling up her car with gas, lawn work, cleaning out the fridge, cleaning out her car) and give her coupons or set dates that you will do that for her.  In the same vein, think of something she's always wanted done to the house, but never been able to do (paint, landscape, organize etc.) and get enough people together to get it done.  It isn't fancy or wrapped pretty, but I assure you every time she sees the work you've done, it will matter more than the sweater, CD or other gift you got her.

Saturday, December 25, 2010

Placemat Crochet hook Roll


Using the same basic method as my Crayon Pouch you can make a Crochet Hook Roll.  Just fold up 5 inches from the bottom and sew every inch (or about that much, some may be a little bigger/smaller to adjust for the length of the mat.)  Fold the top down to meet the opening of the slots and stitch the top fold right at the edge.


For the closure, I used 2 decorative buttons and some round black elastic, but you could do the ribbon method from the Crayon Pouch, just make sure to sew the ribbon on first (before the pockets are sewn) and to only attach the ribbon as far as the pouch will roll, not the whole length.  There is probably also a way to do buttons or Velcro closure of some kind. 

Thursday, December 23, 2010

Bib from Dad's Shirt.


I got this idea from another blog, but I didn't use a pattern or their tutorial so I don't remember where I saw it.  If you saw something like this somewhere else, I'm not taking credit for the idea, just sharing my version of it.

My husband was getting rid of a shirt that didn't fit him well anymore.  Aside from some wear in areas from age, the shirt was still good and I thought I could make something out of it.  My first thought was a dress for my 2 year old but seeing as how I was swamped with Christmas stuff, I wasn't willing to commit my time to that.

Therefore we have the Shirt Bib.

All I did was get a bib that I liked the shape and size of and use it as a pattern.  I pinned it  to the front of the shirt where it buttoned and cut it with about 1/4 inch seam allowance.  I bought a coordinating hand towel (probably $1.50) and cut out the same pattern.  I stitched the two together (right sides facing each other) and left a 2-3 inch opening to allow me to turn the bib.  Then I top-stitched around the whole thing which closed the opening and helped the bib to "sit" flatter when on.  Because of where I cut the shirt, there was only one button attached so I cut off another one and it helped to keep the two layers from shifting.  I cut some Velcro for the neck and sewed it on.  The whole thing took a couple of days on and off (like 5 minutes here and there) and I think it looks pretty cute. :)

Sorry for the lack of step by step pictures.  I wasn't sure it would work the way I wanted and didn't think to take any pictures as I went.  But its pretty easy I swear.

Wednesday, December 8, 2010

Poinsettia Hair/Hat Clip


Using the tutorial from Infarrantly Creative I made my daughter and niece some hair (or hat) clips.  I didn't print out the template ,but used my daughter's head as a starting point for a good size clip.  I didn't have (or remember to buy) a button making kit, so I just used a circle of felt for the top to cover the stitches.   I also added some grosgrain ribbon around the clip so it didn't pull the girls' hair.

My 2.5 year old actually "helped" by pulling the needle through after I had pushed it most of the way, so it was nice that she felt like she could participate in the sewing. 

How to make a travel crayon pouch

 
I made this for myself and my daughter to eliminate a frustration I had.  She loves to color and will do well coloring at restaurants and places where we have to have her sitting for awhile, but keeping crayons in a diaper bag is not practical.  I had seen many crayon case tutorials online, most of them were rolled up in little spirals and tied with ribbon.  I thought about it and realized I would need something for her to draw on and the paper will get mangled and lost in the diaper bag. So I made a slight modification to what others had done and made this pouch. This way I can keep a small notepad or even folded coloring pages in there and not worry when I get somewhere that she needs paper.   


Difficulty = Easy
Minimal sewing skills are required, just basic knowledge of your machine.  Must know how to make a straight stitch and back stitch, thread and load a bobbin and thread the machine.  Depending on the material of the place mat, mistakes can be easy to disguise.  The type I used is great for hiding flaws.  It is ribbed in texture which helps provide guide lines to follow when sewing and mistakes are not evident if the thread matches.

Materials:
*A cloth place mat, the kind I've been using is available at Walmart (sometimes) and Target (in solid colors)
*A 16 count box of crayons
*a small note pad (I got a 3 pack of Mead 4"x6" memo pads from the grocery store for about $1)
*Grosgrain ribbon in a coordinating color in 1/4" to 1" width depending on preference or what you have available (black works well for most and a small roll would be under $2)
 *Thread that blends with the place mat
* sewing machine
*Ruler or tape measure
* pins

Steps
 1. Fold up the long side of the place mat 3 inches.  Sew along the existing seam or as close to it as you can on both sides.


2. Measuring from that first seam, mark four 1 inch sections for the pockets. 


3. After the 4 pockets measure 4.5 inches from the last seam.  This will make your notepad pocket. 


4. From the end of the 4.5" pocket continue measuring every inch to the last seam on the right side.  If the place mat isn't measuring perfectly within the inches adjust each one slightly to make the pockets look about the same size.  Also, I noticed with the first pouch I made, my place mat was not as long as the subsequent ones I bought and I had to eliminate a whole pocket from it.  It doesn't matter too much because fitting 12-14 crayons will be enough variety for most kids.

5. Sew each line from the top of the flap down to the fold.  Make sure to back-stitch at the beginning and end of the line.  If you're fast and did all your measuring/pinning,  this should only take about 10 minutes..


6. Pin the ribbon tie to the back of the pouch just above the slot openings (about 3 1/4" up from the fold.)


7. If you can, adjust the width of  your stitch to the narrowest width so you can get close to both edges of the ribbon.  Sew ribbon staying about 4 inches from the edge going to 4 inches from the other edge.  Flip around and sew again if you are using a wide ribbon.  For 1/4 inch, one pass will be fine.


Sorry I just couldn't take a clear picture here but you see how close the needle is to the right side (sort of.)

8. Fold the top flap down to meet the slot openings.  Pin this to secure.  Sew right along the top fold to make a permanent crease (less llikely crayons will fall out and more likely it will easily fold to put away.)


9. Insert crayons and pad and fold up.  You're ready to color on the go. :o)


P.S. Suzanne, if you read this, Zach is getting that blue one for Christmas. ;o)

Friday, November 12, 2010

Earring Holder


Thank you to my sister in law, Lizzie, for having so many earrings and inspiring me to make this project.  I walked into Lizzie's room about a month and a half ago and saw over 30 pairs of earrings laid out on her dresser top.  She couldn't see them in the jewelry box and therefore never worse some.  So my brain went "!!!!!!!!!"  She needed a solution and her birthday was coming.  I searched the internet and found a great tutorial for exactly what I wanted. Check out the tutorial HERE.


I made some more for my Mother in Law who wanted them backless.  This added the option for her to put in some dangle post back earrings too, not just the hook post kind.  Also this one would let the wall color show through.

Instead of a picture hanger, I thought the grosgrain would look cute as a hanger.
Here are the earrings organized on the holder.  Told you she had a lot :o)


Wednesday, January 13, 2010

Things to make before Baby #2 arrives.

carorganizers1.JPGCar Seat Organizer
This is a much needed addition to my car.  Before my daughter was born and I was the only one in it, I had my work life occupy most of the space (think mass amounts of teacher stuff).  After she was born, it became a place that needed toys, snacks, tissue, wet wipes, water bottles etc. on hand all the time.  It is basically a large moving diaper bag.  So I'm guessing that with a toddler and a newborn it can only get worse.  I need to intervene before my Corolla gets out of hand.

*UPDATE: I did not end up making these.  I still am considering making one but with a rear facing seat on one side and my Forward Facing seat for my toddler on the other there is even more limited space.


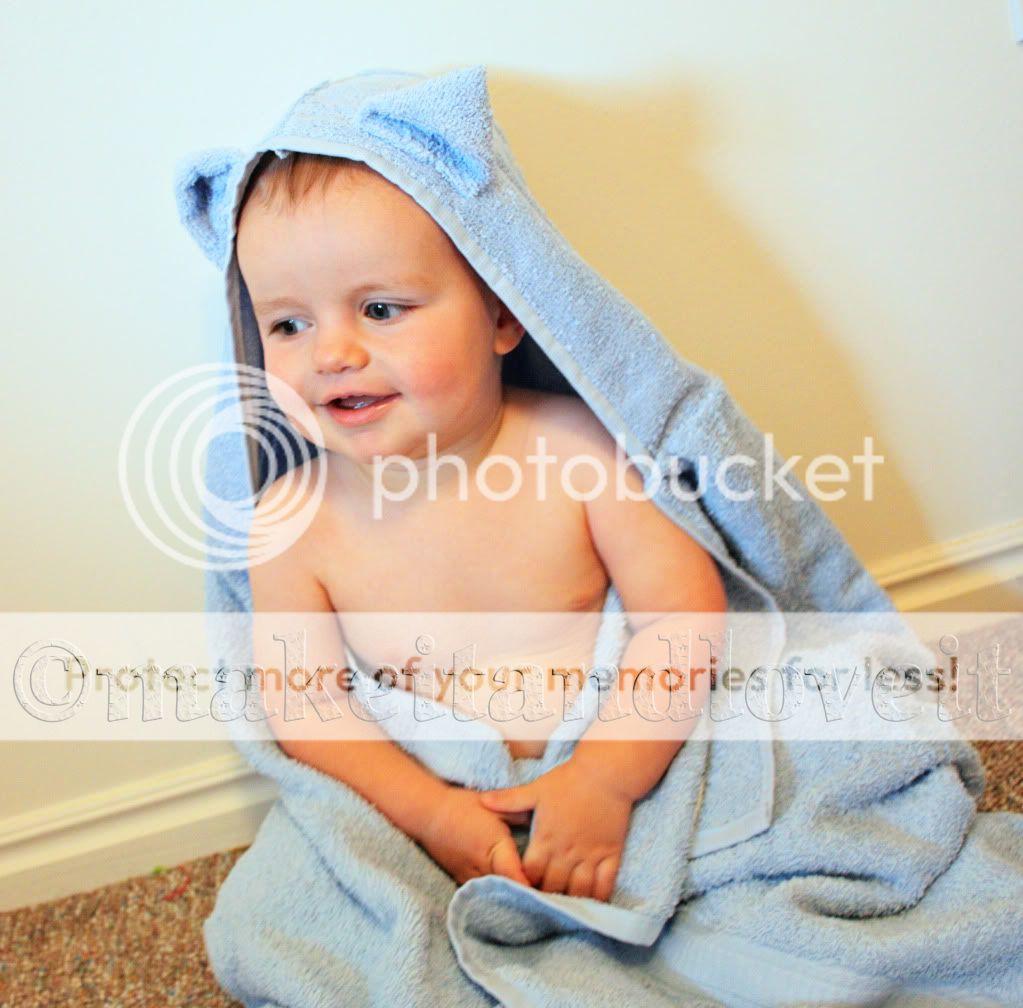
I received numerous "cute" baby towels at my baby shower and all of them except one were thin and small and would barely wrap around my newborn let alone absorb water.  The one that did work was more expensive but still not that good at coverage.  I want to make this for my daughter and the one on the way because it will be so much easier to wrap them.  Also, I can make a few so I am not waiting for laundry to dry to have a towel ready.

*Note: if you are getting a baby shower gift skip the hooded towels and make a few of these.  Also, I would wash the towel at least twice in a "free and clear" type of detergent.  There are threads and snags that will show up, especially on the hood and areas that were cut, and it would be good to cut them after each dry cycle before giving to the mom to be or kid.

Place mat Diaper Case

I want to make 2-4 of these (yes all for myself.) There is a likelihood that my daughter, who will be 2 at the time of baby #2's arrival, will be potty trained.  But on the chance she isn't I will have to deal with 2 separate diaper sizes everywhere I go.  I figure I can find place mats pretty cheap, and if the potty training sticks I can give some away or use them as back ups in the car or at the grandparents houses.

LinkWithin

Related Posts Plugin for WordPress, Blogger...