Showing posts with label Tips and Hints. Show all posts

Saturday, February 2, 2013

Easy Fix for Potty Seat


This was one of those things that bugged me daily but I never did anything about it.  I would kick around the seat, move it to the side, on top of the wastebasket, behind the toilet, etc.  It was always in the way and there was no where it seemed to fit.

I took a shot that the handles on the side would fit with a Command Hook and bought a pack.  Now my daughter hangs it up about 60% of the time after she is done and it is easily put away in a second by anyone who uses the bathroom next.  

Thursday, June 7, 2012

"Soilove" love

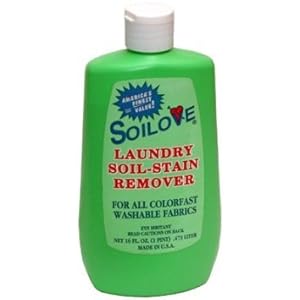
Soilove Laundry Soil-stain Remover New
I have previously mentioned that Soilove is awesome.  But I had an experience this week that has made me love this more.

Have you ever had that moment when you hear something clicking in the dryer only to investigate and find the chapstick or lipbalm you left in your pocket?  Well if you have, you know the sinking feeling you get as you check through the clothes and find which have been damaged by the pure, lip softening oils that have been melted and tumbled through the load.

I had several items of clothing with smatterings of Burts Bee's Pomegranate Lip Balm on them (it has the added fun of a pink hue so it stands out more than just a clear chapstick.)  I was sooooo bummed.

I went online and read how to get it out and there were many suggestions involving Dawn or solvents.  I did not have any Dawn left and then I thought of Soilove (which definitely has a solvent smell to it.) I put it on all the spots I could see and rewashed.  Things had improved, but were still visible so I reapplied the stain remover and washed again and after that load I couldn't see any spots.

Due to my stress and panic I didn't think to take pictures, but I was seriously excited and relieved when those spots were gone.  I have also used this on other stains with success (berries on light clothing for example.)  It is sold several places, but your best bet is the 99 cent store where a bottle is 99 cents as opposed to 1-3 dollars in other stores or even more online.

I still don't know what's in it but it says it can "Safely remove blood, grease, ink, beverage stains, food, grass, perspiration and most other stains. For all colorfast fabrics."  I might have to ditch the expensive stain fighters and stick with this stuff. :)

***Edited to add: I did notice that I had either missed spots or some were too bad to fix and there were some items of clothing lost to the evil lip balm, but I still stand by that it gets out baby poop like magic (the only other thing I found that works really well is sitting it in the sun after I wash it to bleach/dry)

Monday, November 14, 2011

Make Your Own: Laundry Detergent


I came across a method to make your own detergent.  There are probably hundreds of posts on how to do this  but I liked the method of dispensing this blog used and her picture directions.

I am not doing a full explanation here since you can click on the link and see it in full but I will give the general instructions and my opinion of the outcome.

Ingredients & Materials Needed.

Borax
Arm & Hammer Super Washing Soda (find it in the laundry soap aisle)
1 bar of Fels-Naptha (or Zote)
1 large pot
1 large container (holds at least 2 gallons with room to stir)
A lot of water

1) grate 1/3 of the soap bar with a cheese grater
2) put that in a pot with 6 cups of water.  DO NOT BOIL but stir and check until the flakes are melted in.
3) Add the borax and Soda and stir to dissolve.  Keep stirring frequently until it is thicker (almost honey)
4) remove from heat.  (At this point the other post uses a big plastic bucket.  I just kept going in my pot.)
Add 4 cups hot tap water and stir. add a few drops of essential oil if you want (I don't).
5) add 1 gallon + 6 more cups of hot tap water and stir.  At this point I transferred the mix to my drink dispensing container that I use to dispense my detergent.
6) Let it sit overnight (or 8ish hours).  Then take an immersion blender and get it good and mixed.  This step is not needed if you use a plain bucket or a wide mouth container to pour it but it IS necessary if you use a drink dispenser like the one shown.
7) If the detergent separates while sitting, shake prior to use then use 1/2 cup per load of wash.

I've read that this is safe to use on HE machines as well.

What I like about this is that it costs under a dollar for 2 gallons of detergent, which is 64 loads worth.  Compared to store bought detergent you are saving anywhere from 5-$15 or more depending on the brand you buy.  I wish it had that "detergent smell" after you are done washing.  It smells great in the container, but leaves no scent on the clothes unless you add your own in the process, which is probably better being that there isn't a lot of fragrance added.  Also, the separation that occurs when the container sits can be frustrating especially when it is full.  I get a good arm workout shaking up 16 pounds of liquid before a load. :)  In general, it seems to work well and I still use pre-treaters or stains.

Tuesday, May 17, 2011

Great Idea!

Image Source
I came across this website on a friend's Facebook page.  It is one of those "Why didn't someone think of that sooner?" type sites. 

Take Them A Meal, lets you create a meal schedule for someone in need.  This might be due to illness, a new baby, or some difficult times in their lives.  People can search and sign up for a meal slot so meals are organized.  I would love to use this next time someone I know needs it and will be suggesting it to friends.

Friday, March 11, 2011

Non-Working out Update

My work out habit was derailed greatly around Christmas.  After getting sick as well as having less and less time, I just haven't started up again.  However, I have found a great way to keep the weight off AND lose more!

Step 1: Find an accountability partner.  Someone you don't live with who you will be able to communicate with daily.  It is helpful if they want to lose weight too.


Step 2: Find out your BMR, then find out your caloric needs for your activity level. 

Go to these sites:

http://caloriecount.about.com/cc/calories-burned.php

http://www.bmi-calculator.net/bmr-calculator/bmr-formula.php

These sites are really helpful in figuring out how many calories you need to maintain, lose, or gain weight.   Figure out your calorie's for the day and share that goal with your partner.


Step 3: Write down (in text, email, Facebook message, etc.) EVERYTHING you eat along with the calories in all of it.  At the end of the day get the total.

This only works if you are honest.  You have to pat attention to every snack, drink, nibble etc.  It is also my suggestion that you always round up in the calories estimated.  If something was 375 calories, just go to 400 instead.  The reason is because you will likely underestimate if you let yourself and this leaves a little room for those extra crackers you ate from your kids snack pile but forgot about while at the park ;o).

I also am still nursing quite a bit so I added that in by upping the activity level I had when figuring out my caloric needs.  My goal is around 1600 calories a day but I range from 1500-1700 most days.  I have found that cutting out sugary drinks (soda, juices, etc) helps a lot and keeping the portions close to the suggested amount is important.  If I know the serving size is ridiculously small I try to figure out how much I actually eat.  For example, pasta has a serving size of 1/8 of a package which is 200 calories.  1/8 is not enough food for me so I eat about 3/8 or so.  That with sauce will be about 700-750 calories.  It sounds like a lot but not if I've eaten a normal breakfast and lunch and avoided my downfall which is eating when I'm bored or avoiding housework. ;o)


Anyway, since starting this around January, I've lost another inch on my waist and hips (without exercise) and I've lost about 3 lbs.  SO if you don't have time to workout, find a friend that will be your food accountability buddy and be brutally honest about your eating habits (the embarrassment will make you put down that 2nd or 3rd brownie.)

Thursday, February 10, 2011

What to Give a Mom

There are ample amounts of holidays and reasons to give a gift to the moms in your life.  Christmas, Valentines Day, Birthdays, Mothers Day, Anniversaries, or just because.  With all of those opportunities, many people wrack their brains trying to think of the next thing to get for their mother, wife, grandma etc.

Well here is a list that I think would help a lot of people who end up saying "I just don't know what to get her."

1.) Time with you:  If you are a child older than 10, you most likely have a "life" of your own.  I am also referring to all adult children no matter how old you are.  Your mothers want to see you and spend time with you.  Unless you are a serious pain in the neck who has shamed the family with atrocities, your mom misses you and wishes she could spend more quality time with you (and even with your spouse and children.)  Give her a "date" with the family.  It can be as simple as picking up dinner and hanging out, or going to a park and having a picnic with her.  Just think about being able to talk to her and give her time to relax with the family.

If you are a husband, a date with you doing something SHE likes or has always wanted to do with you.  If its inexpensive its okay, but it should be focused on her (including letting her know how much you enjoy being with her and spending time with her.)   Its is especially important that you plan it, prepare for it, and deal with all the details (babysitting, place, time)

2.) Time for herself:  This is especially true for mothers with kids at home.  Most moms have to be forced to spend time on themselves.  Pedicures, haircuts, shopping trips (for her not the kids), a nice lunch with friends, time for her hobbies are all things that get put on the end of the list when you have a family.  Think about the moms in your life and what they used to do pre-motherhood or what they have mentioned such as "when I ever have the time I'd love to...".   Sometimes an hour or two to concentrate on anything other than the house, kids, groceries etc. can be refreshing.  Again, it is important that this is done in addition to planning the details (babysitting, timing, dinner afterward so she isn't worried about it etc.)

3.) That thing she asked for: Seriously, the item or things she has been asking for, pointing at, emailing you about over and over.   She has said it, I promise you, and she has said it as bluntly as you can imagine "I REALLY WANT...".  If you haven't heard her or forgot, start sending yourself emails, texts, or saving a "Gift Idea" file for her and every time she mentions that thing/things write it down, set an alarm and save it somewhere for the next time you need to get her a gift.  Don't think it will seem like you weren't thoughtful for getting her what she wanted.  She will be so happy you listened and remembered and that you didn't just run out and grab some random gift to wrap, but got her something she actually wanted.  I'm really, really serious about this one. (AND I'M MOSTLY TALKING TO THE HUSBANDS HERE!)

4.) Something thoughtful:  This is not an easy category but it is a good one.  There are not a lot of specifics here but things to think about (AHEAD OF TIME) that will be super awesome when you have to give a gift.
FOR HUSBANDS: Think back to when you were dating like the first year or so of courtship.  Think about how you would notice things about her.: What her favorites were, things she needed but didn't know she needed, just little things you paid attention to because you actually wanted her to like you.  Try doing that for about a month and you will get some idea(s) that you might never have thought of or that she hasn't even asked for yet. 
FOR YOUNG CHILDREN:  Something sincere telling your mom how thankful you are for her for specific things she does and how she takes care of you (a letter, story, a handmade card, or artwork.)  Also, something from all the children that will capture a memory from that age like a photo book, hand prints, etc (most likely this will require grown up help which will also get a lot of appreciation for Husbands who assist.)
FOR ADULT CHILDREN:  Do something that creates a memory or brings back an old one.  Collect favorite clothes of yours and your siblings and make a quilt, or shadow boxes.  Something that shows a special connection for the two of you in particular.  Something involving the grandchildren is always fun too.
FOR ANYONE:  Think of something she HATES doing (filling up her car with gas, lawn work, cleaning out the fridge, cleaning out her car) and give her coupons or set dates that you will do that for her.  In the same vein, think of something she's always wanted done to the house, but never been able to do (paint, landscape, organize etc.) and get enough people together to get it done.  It isn't fancy or wrapped pretty, but I assure you every time she sees the work you've done, it will matter more than the sweater, CD or other gift you got her.

Sunday, January 23, 2011

What works when feeding toddlers/babies

Between about 12 months to 4 years old (and maybe further) kids are figuring out food and can be pretty picky sometimes.  I have been blessed with a daughter who will eat ANYTHING and likes almost everything, but there are still tried and true foods that she will always want and hardly put up any argument to eat plus they are usually easy and portable.

1.) CHEESE

This includes just plain cheese slices, string cheese, or cheese chunks.  Also, cheese as an accessory.  Put some cheese on anything and it is more appealing and more fun.  If a kid is wary of something...try it with some cheese.

2.) Quesadilla

This would appear to be an extension of #1, but it is a different category.  I keep soft taco sized wheat tortillas in the fridge and ALWAYS have some sort of shredded cheese in there too.  You can put anything in a quesadilla and 1.) it follows the cheese rule and 2.) its instant utensil-free finger food.  It's also a portable and a fun option when sandwiches are getting old.  I put veggies in it, turkey, chicken, a layer of mashed beans, whatever I have or just cheese and my girl will happily eat it.

3.) Peanut butter.

Here you will get some people cringing about allergies or sugar.  You can find "natural" peanut butter with no crazy extra ingredients and not much sugar.  Also, there are other nut butters and seed butters you can find in most stores or health stores.   Peanut butter is easy and portable and can mix with a lot of flavors in a sandwich or as a dip.  Make sure your child can chew well and swallow...at 12 months just a small thin spread on a piece of toast is enough so it won't be too sticky and become a hazard.

4.) "Lunchables"

Not the actual ones, but your own versions.  If you are out and about, cut up everything in a plastic container put in some whole grain crackers and let the kids eat like that.  Its not a good meal on the move (in the car or stroller) but it works at a park where you can sit and enjoy the day for a bit.

5.) Muffin Tin Meals

The concept here is to separate components of a meal into muffin tins, sort of like a lunchable, but with more options.  This can be meats, cheeses, veggies fruit, sauce, and even a treat.   The more colorful and fun it looks the more they will want to eat and be willing to try.  This is more of an at home meal than a portable one, but it works well as an indoor "picnic" or when you just don't have time to make anything, throw a bunch of stuff in and it looks fun.

6.) Cookie cutters/Sandwich cutters.

My daughter will eat any sandwich if it is in a fun shape.  There are sandwich cutters as well as just regular cookie cutters that work for this.  The sandwich cutters leave less waste for actual sandwiches and save time cutting off crusts.

7.) Smoothies

These are not always convenient to make but they seem like a treat and have a ton of nutrients.  Put in some plain yogurt, berries, bananas, etc. and you have a pretty good breakfast or lunch.   This is best when kids can suck through a straw or drink from a cup but you could do a thick one and use a spoon too.  I've also seen people make smoothie Popsicle and its almost as good as ice cream.  It's also a good option when kids are sick and need to eat but don't want solids.

8.) Noodles (pasta)

Especially finger food type shapes (bow tie, rotini, penne, rigatoni, fiori)  When they are really little, ct them into reaaly small pieces.  Later when they ae adept at chewing enough before they swallow, let the kids at it.  Expect a mess but this was one of the first foods my daughter gladly fed herself.  If you have kids, you know that it takes at least half an hour of frustrated feeding to get them all done.  When she was able to feed herself, I was able to eat my dinner with her, or clean up a little while she sat in the high chair.  Just be prepared with wipes or a wet wash cloth to wipe them down afterwards.

9.) Naked Eating and Eating Shirts

Did I mention, any messy foods would usually be eaten naked if possible?  If we are at home, it's the easiest way to avoid ruining a ton of clothes.  Another option is to have "eating shirts"  basically a tshirt that is too big and not really fashionable (we got ours from a summer reading program that only had kid sizes not toddler/baby sizes) and it can be slipped over their whole outfit or just over their bodies and thrown in the wash .  You can get some at the Dollar store too and make em cute if you want.  After kids start self feeding, bibs just don't cut it.  Food will end up from head to knees and in all cracks and crevices so much more protection and coverage is needed.  You can also never let your kid feed themselves but then you will never be free to do anything...ever again.

10.) Hide the "good" stuff (or actually the bad stuff)

For as long as possible avoid things like chicken nuggets, fries, soda, anything super sweet or super salty.  Don't dress food with extra sauces if you don't need to.  Most food is tasty on its own (sweet potatoes, peas, carrots, fruit etc.)  and it does not need anything added.  My daughter likes hamburgers and I know its not the best option overall as a food but if we go out she will get a small burger with no mayo, no fries, and water or a very small juice box.  I know if you are a new and "informed" parent you are thinking there is no way you would give your kid bad foods.  Well when you are running errands and your toddler is hungry but you forgot to pack something suitable or you ran later than you thought, those drive thru's are hard to resist.  You can usually get away with something less evil if you do a little research ahead.  Jack in the Box has grilled chicken strips, a plain hamburger isn't too bad and has a lot of protein, most places have a grilled cheese option (though it will be really cheesy and kind of greasy.)

Tuesday, September 7, 2010

Cheap and Easy, Travel Bed Rail.

Do you have a toddler who doesn't fit in a play yard anymore? Or perhaps you co sleep and can't bring all the comforts of home on your trip.  Well I found a solution.

POOL NOODLES!!!

I can't take credit for this idea.  I read it on an online message board but it was too good and easy not to try.

First, buy 1 or 2 pool noodles for each bed you will use it on.
Next place the pool noodle under the fitted sheet just at the edge of the mattress.
Now tuck the sheet in tight under the mattress so it won't shift.  I added the flat sheet too so I could tuck it more since my daughter doesn't really sleep with a sheet yet.

After the bed is all made it makes a really simple bed rail so your child won't roll off the bed.  We set the fold out bed in our cabin against the wall so we only needed one noodle.


I don't have pictures of the other use because the explanation is the same.  If you co sleep use the noodle in your bed (at home or traveling) so you don't have to worry about the baby rolling off the edge.  Also for an infant, this is great to have in the trunk of your car.  You would only need half a noodle or two halves.  Keep them there and when you stop by a friends or a relatives and need to give your infant a nap you can make a safe little space so they won't roll off the bed and you don't have to haul the pack and play to those short day trips.***NOTE: If you are putting a child under the age of 1 on a bed please keep the area clear of blankets and pillows.  Using the noodles as a bed rail can leave a place for a baby to suffocate if there is too much fabric.  Check on your baby regularly if you do this. ( I realized after posting that since this is public there usually needs to be these disclaimers for those of us that may need them.)


Featured on...Design Dazzle Craft DIY Ideas

LinkWithin

Related Posts Plugin for WordPress, Blogger...