A collection of useful hints, handy tips, and inexpensive ideas for your kids, family, and home.
Sunday, September 26, 2010
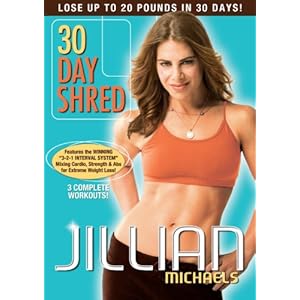
30 Day Shred Week 2
Level 2 Overview
The "easy" version of each exercise still kills. There is a 2 minute warm up and cool down with this level too. Though there is only 1 "cardio" section per rotation, most of the other exercises feel like cardio too. Much more sweat involved in this level.
Strength Moves:
Walking Push Up (easy option: instead of doing the push up at the end, hold a plank position)
Squat Row with Weights (easy option: don't squat as low)
Static Lunge with Row (easy option: don't lunge as low)
Pendulum Lunges and Hammer curls (easy option: don't lunge as low)
Leg Extension with Shoulder Press (easy option: less extension)
Chair Squat with "V fly" (easy option: don't squat as low)
Cardio Moves:
Jogging in place with high knees (easy option: lower knees)
Squat Thrusts (easy option: Plank pose with alternating forward step touches)
Obliques Twist (no easy option)
"Skaters" (easy option: less of a leap more like a step touch)
Plank Jacks (easy option: plank with a side step touch alternating)
Double jump rope (easy option: single)
Abs Moves:
Crunch with single leg lift (easy option: keep leg higher instead of lowering it to 2 in. off the floor)
Chest weights with double leg lift (Weights held up at full chest press legs straight out and lifted straight up)
Crunch with knee lift
Plank Twists (No easy option and its so HARD)
Day 8:
My formerly awesome sleeper/napper has decided to work against me. He woke up twice during the half hour I was working out. But I did it anyway, just had to stop which is not really the point of her workouts. I went back to level 1 today so I wouldn't have to focus on a new routine but I did try to do the harder versions of the exercises instead of the easier versions.
Day 9:
Another frustrating day in nap land but I did level 1 again, finishing while my 4 month old curiously watched me from the sidelines.
Day 10:
Yay! The kids stayed asleep today and I did Level 2. I'm sticking with this level for at least a week or more. I did 1/2-2/3 of the exercises following the "easy" example chick. At the end, I was so sweaty my glasses were fogging up. Sexy right? LOL
Day 11:
Level 2 today. There is a point in this level where she says "I want you to feel like you are going to die." Seriously, she says that as motivation. As if the intense desire to collapse is a good thing.
Day 12:
I decided Fridays are my days off from Shreding. So today is another break day for me. Although, I ended up feeling like I worked out after a long hot day with the kids.
Day 13:
Level 2 again. I am doing at least 1/2 or more of the exercises without resorting to the "easy" version and some exercises don't really have an easy option.
Day 14:
Level 2 again. So tired, want to lay on the floor, but at least week 2 is done.
RESULTS SO FAR:
Week 2, Exercising 6 days a week, no change in diet or other activities.
I'm really surprised. I lost inches the first week, and by week 2 I could see a serious difference. At this point, my biggest change is in my belly. Not my waist, but the area right around my belly button. After 2 kids and no workouts the muscles were just not in the right place anymore. I have lost 2.5 inches so far just there alone. Also, the workouts get easier every couple days. I can tell when things hurt less and then I know I should probably try the harder one (though I really don't want to). I really don't look forward to working out at all, but I am really motivated by the changes I'm seeing thus far.
Sunday, September 19, 2010
30 Day Shred Week 1
Level 1 Overview
I've read other places that people consider this level an intermediate as opposed to a "beginner". If you have injuries, bad knees, etc. not even this level will be okay for you. The workout consists of cardio, strength and ab work. In the cardio sections, there are jumping jacks, punching while in a squat (boxing), running in place (kick your butt), and imaginary jump rope. In the strength sections, there are push ups, lunges, squats, and flies with weights. The ab section includes crunches, oblique crunches, bicycle crunches and leg lifts.
Day 1:
I thought, 20 minutes...no problem. How hard can it be?
HA! I was schooled. I did level 1 of the shred and by 1/2 way through I was tired and hurting in places that hadn't been worked out since before by 1st pregnancy (or longer). Jillian was not as mean as I thought she would be but she doesn't stop for mid way stretches or breaks because its only 20 minutes. Every exercise works more than one part and they are not hard to learn like a big aerobic dance workout. The exercises burned so they must be working.
As the 2nd half wore on, I found myself cussing to myself (kids are napping) and just wanting it to stop. My muscles are shaking and I am sweating a ton. Lord I hope I don't wimp out on this. I really want to do it the whole way through.
Day 2:
Owwww...I'm sore. (whiny tone)
But I did it even though my 4 month old woke up right near the end, I finished. Still on Level 1.
Day 3:
Still sore but not worse than yesterday. I had a hard time getting to the workout because my 4 month old kept waking up from his usual long nap. So my husband tried it with me tonight. He works out regularly and is in much better shape than I am but he still worked up a sweat with level 1.
Day 4:
Still sore. Mostly in my calves, quads, and shoulders/chest. The hardest thing is that I am sore because of the workout and working out the same way is painful. I am not one to happily step into causing myself pain. I keep hearing it starts getting better around now...we'll see. My husband did TDS with me again. :o)
I am having a lot of trouble near the end of certain sets because my muscles are so tired and shaky. Fun stuff.
Day 5:
I took a day off here because I had no time during the day and no energy that night.
Day 6:
Still sore. My legs didn't want to do some of the things I was asking them to do. But I got it done.
Day 7:
I don't want to work out but I'm going to anyway....Does this ever get easier?
I did Level 2 out of curiosity. Seriously a new Level of difficulty. She seems to like the plank position more at this level. Ouch, can't wait to see what's sore tomorrow.
Saturday, September 18, 2010
Spinach Recipes
I don't know how or why, but my daughter loves vegetables. Spinach is one of her favorites as well as my husband's so I thought I'd post a couple of our favorite recipes using spinach.
Cheese and Spinach Tart
From Parents Magazine Jan. 2010
1 tsp. olive oil
2 c. diced onion
1 9 inche frozen pie shell
1 c low fat milk
3 large eggs
1 c mozzarella shredded
1/2 tsp garlic powder
1/2 tsp Worcestershire sauce
1/4 tsp salt
1/4 tsp pepper
1 10 oz package chopped frozen spinach (thawed and squeezed out as much as possible)
1.) preheat oven to 350. Heat oil in a skillet. Add onions and saute on medium high for 10 min. or until caramelized. Remove and let cool.
2.) Prick pie shell with fork. Bake 10 minutes. Meanwhile whisk egg, milk cheese, garlic, Worcestershire, salt and pepper. Add onions and spinach. (NOTE: I also add some nutmeg just because I like it)
3.) Pour mixture into cooled pie shell and bake 45 minutes or until knife comes out clean.
(Served in magazine with a side of glazed carrots)
*TIP : Take the spinach out of the freezer the day before and put in the fridge in a container. If it is still not thawed the next day put in microwave to defrost for a couple minutes. Put the spinach in a strainer with a heavy-ish bowl on top and let it drain in the sink for a bit. Go back and push the bowl in and around until the water is mostly squeezed out.
Go Green Giant Calzone
Rachelraymag.com/November 2009
- 6 Servings(6 according to the magazine but I'd say 4 with a little leftover)
- Prep 25 min
- Bake 35 min
Ingredients:
- 2 pounds baby spinach (used 1 package frozen)
- 8 ounces sweet Italian sausage, casings discarded (optional: in my opinion tastes good without sausage)
- 2 tablespoons extra-virgin olive oil
- 1 onion, chopped
- 12 ounces mozzarella cheese, shredded
- 1/4 cup grated Parmesan cheese
- Salt and pepper
- 1 pound store-bought pizza dough (whole wheat or regular)
- 1 1/2 cups store-bought marinara sauce
Directions:
- In a large skillet, bring 1/4 cup water to a boil over medium-high heat. Add half of the spinach and cook, turning, until wilted, 1 to 2 minutes; drain. Repeat with the remaining spinach. Let cool slightly, then squeeze to remove as much moisture as possible. Coarsely chop, then transfer to a large bowl.
- In the same skillet, cook the sausage over medium-high heat, breaking it up, until browned, about 5 minutes. Add 1 tablespoon olive oil and the onion and cook, scraping up any browned bits, until the onion is softened, about 5 minutes. Transfer to the spinach mixture. Stir in the mozzarella and Parmesan; season with salt and pepper.
- Preheat the oven to 425°. Grease a baking sheet with 1 1/2 teaspoons olive oil. On the baking sheet, stretch out the dough to form a 10-by-15-inch rectangle. Mound the filling lengthwise down the center of the dough, leaving a 1-inch border on the short edges. Fold the 1-inch edges toward the center, then fold each long side over the filling. Flip the calzone seam side down and re-tuck any open ends. Rub the remaining 1 1/2 teaspoons olive oil over the calzone, then cut 2 small vents in the top. Bake until golden, 30 to 35 minutes. Serve with the marinara sauce.
Tuesday, September 7, 2010
Cheap and Easy, Travel Bed Rail.
Do you have a toddler who doesn't fit in a play yard anymore? Or perhaps you co sleep and can't bring all the comforts of home on your trip. Well I found a solution.
POOL NOODLES!!!
I can't take credit for this idea. I read it on an online message board but it was too good and easy not to try.
First, buy 1 or 2 pool noodles for each bed you will use it on.
Next place the pool noodle under the fitted sheet just at the edge of the mattress.
Now tuck the sheet in tight under the mattress so it won't shift. I added the flat sheet too so I could tuck it more since my daughter doesn't really sleep with a sheet yet.
After the bed is all made it makes a really simple bed rail so your child won't roll off the bed. We set the fold out bed in our cabin against the wall so we only needed one noodle.
I don't have pictures of the other use because the explanation is the same. If you co sleep use the noodle in your bed (at home or traveling) so you don't have to worry about the baby rolling off the edge. Also for an infant, this is great to have in the trunk of your car. You would only need half a noodle or two halves. Keep them there and when you stop by a friends or a relatives and need to give your infant a nap you can make a safe little space so they won't roll off the bed and you don't have to haul the pack and play to those short day trips.***NOTE: If you are putting a child under the age of 1 on a bed please keep the area clear of blankets and pillows. Using the noodles as a bed rail can leave a place for a baby to suffocate if there is too much fabric. Check on your baby regularly if you do this. ( I realized after posting that since this is public there usually needs to be these disclaimers for those of us that may need them.)
Featured on...
POOL NOODLES!!!
I can't take credit for this idea. I read it on an online message board but it was too good and easy not to try.
First, buy 1 or 2 pool noodles for each bed you will use it on.
Next place the pool noodle under the fitted sheet just at the edge of the mattress.
Now tuck the sheet in tight under the mattress so it won't shift. I added the flat sheet too so I could tuck it more since my daughter doesn't really sleep with a sheet yet.
After the bed is all made it makes a really simple bed rail so your child won't roll off the bed. We set the fold out bed in our cabin against the wall so we only needed one noodle.
I don't have pictures of the other use because the explanation is the same. If you co sleep use the noodle in your bed (at home or traveling) so you don't have to worry about the baby rolling off the edge. Also for an infant, this is great to have in the trunk of your car. You would only need half a noodle or two halves. Keep them there and when you stop by a friends or a relatives and need to give your infant a nap you can make a safe little space so they won't roll off the bed and you don't have to haul the pack and play to those short day trips.***NOTE: If you are putting a child under the age of 1 on a bed please keep the area clear of blankets and pillows. Using the noodles as a bed rail can leave a place for a baby to suffocate if there is too much fabric. Check on your baby regularly if you do this. ( I realized after posting that since this is public there usually needs to be these disclaimers for those of us that may need them.)
Subscribe to:
Posts (Atom)