Wednesday, October 27, 2010

CHICKEN COUSCOUS WITH RAISINS


 1 c. couscous
1 chicken breast (1 big or 2 small)
1/4 tsp. ground cinnamon
1/2 tsp. ground cumin
1 tsp. turmeric
1/4 c. raisins
1 tbsp. canola oil
1 onion, finely chopped
4 garlic cloves, finely chopped (4 medium or 3 large)
2 c. low sodium chicken broth
Optional: 2 tbsp. slivered almonds

1.) Put the chicken breast in a medium pot with the broth and cook until its done (soft and easily shreaded).  If you want, put 2 breasts in and save one for another meal during the week.

2.) After chicken is done, remove from pot and remove broth and save in a cup or container. Put in oil and onion cook until translucent.  Add garlic, cook another minute or two.  Add in the broth back in.  Add the spices back in.  Check for saltiness and add some if needed.  Cut the chicken into small bits, because it is so tender it will cut and shred really easily.  Add chicken to the pot.  Bring to a low boil and simmer for 10 minutes.

3.) While that is happening, microwave a cup of water to boiling hot (about 1 min 30 sec is fine).  Add this to a good sized bowl with the couscous and raisins and cover for 5 minutes.

4.) Uncover the couscous and fluff with a fork, put on a large plate or serving dish.  Scoop chicken and onions onto the couscous in the center (I like to make a hole in the middle of the couscous for the stuff to sit in).  Pour the broth over the whole thing and let the couscous absorb the flavor for a few minutes before serving.


OPTIONAL sprinkle chopped almonds on top.

Serves 4 if you have a side dish with it.  For us it feeds 1 hungry husband, me,  and one 2.5 year old who eats a lot.

Monday, October 25, 2010

Baby Legs


Tutorials for DIY Baby Legs are in abundance online.  So I'm not trying to add to the noise.  I am, however, using this tutorial, which I was directed to by Make It and Love It.   The directions are so straight forward and easy I am upset I never made these for my daughter.  She was forced to be stuck in pants or leggings during her crawling months and I missed out on such a cute accessory option.  Real Baby Legs cost more than I'd like to pay and they tend to be patterned which, in my opinion, can limit their usability.


So, I bought 3 pairs of socks in neutral "boy" colors.  It probably took less than 30 minutes total to make all 3, but that's a hard estimate because I did it over a couple days since I don't have a sewing room ready at hand.

I am anticipating the mobility of my little guy who I am sure will crawl much sooner than his sister did.  Also with the cooler weather coming I may have need for more cover up options in the house as well as outside.  With my Ergo I have noticed his pants pull up and don't cover his calves so I'm hoping this will be one solution to that as well.

Thursday, October 21, 2010

Pumpkin Ricotta Pasta

I may/will tweek this recipe because I just did it and didn't measure anything.  I had about 2/3-3/4 a container of ricotta from another recipe I made.  I had a can of pumpkin in the pantry and I figured I could make a sauce out of it.  So I apologize if its not exact.  My advice would be to taste as you go and add a little at a time to suit your tastes.

Ingredients

1 lb pasta (I would suggest rigatoni, penne rigatte, fettuccine, or linguine but any will do)
1 15 oz can pumpkin puree (using about 2/3 a can)
1 15 oz carton ricotta (using about 2/3 a carton)
1.5 tsp Italian Seasoning
1 tsp garlic powder
1.5 tsp salt
.5 tsp pepper
.5 tsp nutmeg
1.25 c milk

Mix it all in a sauce pan and let simmer for about 10 min.  Serve over pasta. Done :o)

Tuesday, October 19, 2010

30 Day Shred - Before and After Photos

I tried to crop the pictures to as close to the Before day as I could and took the color out just so any contrast could be seen. Please ignore the stretch marks and know that I am still a work in progress. :oP  I also did not include a straight on belly shot because my stretchmarks make me too self conscious for that, give me credit for being brave enough to post what's here. LOL
BEFORE: Front view
AFTER: Front View
BEFORE: Back View Arms
AFTER: Back View Arms
BEFORE: Back View
AFTER: Back View
BEFORE: Side View (my least favorite)
AFTER: Side View

Dream Toys

In an alternate universe I have the space and money for these things for my kids to play with.


Designer Dollhouse
Fun Explorers Rocket ShipRed Vintage Kitchen

Slow Cooker Beef Stew

http://allrecipes.com//Recipe/slow-cooker-beef-stew-i/Detail.aspx

Ingredients

  • 2 pounds beef stew meat, cut into 1 inch cubes
  • 1/4 cup all-purpose flour
  • 1/2 teaspoon salt
  • 1/2 teaspoon ground black pepper
  • 1 clove garlic, minced
  • 1 bay leaf
  • 1 teaspoon paprika
  • 1 teaspoon Worcestershire sauce
  • 1 onion, chopped
  • 1 1/2 cups beef broth
  • 3 potatoes, diced
  • 4 carrots, sliced ( I used the baby carrots and just threw in enough to look like 4 whole carrots)
  • 1 stalk celery, chopped (I didn't have any on hand so I left it out.)
  • 2/3 c to a cup of barley (I added this in because I like thick stew.)

Directions

  1. Place meat in slow cooker. In a small bowl mix together the flour, salt, and pepper; pour over meat, and stir to coat meat with flour mixture. Stir in the garlic, bay leaf, paprika, Worcestershire sauce, onion, beef broth, potatoes, carrots, celery and barley.
  2. Cover, and cook on Low setting for 10 to 12 hours, or on High setting for 4 to 6 hours. (I did mine for about 4 hours on high and a few more on low, mostly so I didn't have to deal with putting it in the fridge until dinner . ) 
  3. Serve with bread.
     
    Overall this was an easy recipe.  It really helps to have everything ready the night before and throw it in while making breakfast.

Sunday, October 17, 2010

30 Day Shred Finale

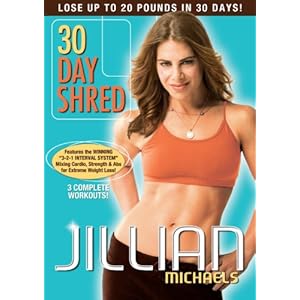
Jillian Michaels - 30 Day Shred

Level 3 Overview:

Strength exercises
1.) Walking Planks**
2.) "Supermans"
3.) Dumbbell Clean with Deep squat**
4.) Jumping Lunges**
5.) Plank Row with Leg lift**
6.) Walking Push ups**


Cardio exercises
1.) Mountain Climbers**
2.) Sumo Squat w/ plie jump
3.) Shadow Boxing with dumbbells
4.) Butt Kickers and Jumping Jacks with Dumbbells
5.) Jumping Squats**
6.) "Rock Star" Jumps**


Ab exercises
1.) Pike Crunches**
2.) Scissor Crunches**
3.) Sit Ups**
4.) Side/Oblique Crunches**

**Indicates an easier option available


Day 29:

Level 3:  I added more of the hard versions of the exercises today.  I am motivated at this point just to get the 30 Days over and see the results in the end.

Day 30

Level 3: Shaky muscles and I needed to workout on a towel so sweat wouldn't drip on the floor.  Lovely.  I'm still going because this is still only my 26th day of actual exercise due to taking 1 day off a week for 4 weeks.


Day 31

Level 3: 27th workout day.


Day 32

Level 3: 28th workout day.


Day 33:

Day Off and I needed it.

Day 34

Level 3: 29th workout day. I was already tired from a long day, its taking a lot of will and peer pressure (from this blog and from my husband) to finish the 30 days.  Part of me thinks "Ah you're close enough" but I know close is not done.  I'm still not great on push ups and my ankle is better but not 100% so I am still doing easy versions of a few exercises.

Day 35

Level 3: 30th workout day!!!!  Again I faced the reluctance to do it for no other reason than because I don't feel like it.  My brother in law just did a whole marathon today and I don't want to work out for less than half an hour, makes me feel so lazy. lol.

Results: Workout 6 days a week.  No change in diet or other activity.

Non Measurable Observations:  My jeans are looser. Clothing is fitting better.  I can see a big difference personally in my mid-section and some difference in my rear end.  I also notice a difference in my ability to perform the exercises.  When I started I peeked at level 3 and thought "No Way! I will probably never even try that level."  But now I'm doing it and it gets easier daily.  My endurance is up and I can tell I am stronger in certain areas.

Measurement Changes:
DAY 1:   Waist = 33"; Belly Button Area = 38.5 " (ewww); Hips = 42"; Left Thigh = 24.5" Right Thigh = 25"
DAY 30: Waist = 32" ; Belly Button Area = 35"  ; Hips = 41" ; L. Thigh = 24"; R. Thigh = 24.5"

Total Inches Lost = 6.5"
Approximate Weight Lost = 4-5 lbs (I wasn't watching closely at the beginning so this is a close estimate from where I started until today.)


In my opinion, this is a great workout to kick start your body into more exercise or to change up your routine.  For me it was a major change to work out at all and my postpartum body was way out of shape (and still needs a lot of work.)  As you can see the overall results aren't dramatic (no 20 lb weight loss and 4 dress sizes,) but there are differences.  I think the program recharged my abs and brought them back in line with the rest of my body.  I think, if I continue with this and some more cardio I can meet more of my goals and get in better shape.  I would definitely recommend this DVD to anyone who wants to try it because it really makes you work and is not a huge daily time commitment.  Feel free to ask questions in the comment section about the workout and I'll answer them if I can.  I am debating whether I will post Before and After photos. It depends on how brave I am this week and if I have time to take some.

Monday, October 11, 2010

30 Day Shred Week 4

Jillian Michaels - 30 Day Shred

Day 22: 

Level 2: I'm having some ankle issues and had to cut back on the jumping today.

Day 23:

Level 3!!!  Still having the ankle issues and still cut back on the jumping but I did Level 3 on mostly the easier versions.  I can already feel that I'm going to be sore tomorrow.

Day 24:

Level 3: I'm sore today in several places that Level's 1 & 2 didn't effect.  I guess that's good, right?  I still did the easier versions.  My ankle is still bothering me.

Day 25:

Level 3: Did about 50-60% with easy version.  My ankle is really not into a few of the moves Butt Kickers and jumping lunges are two of them I just can't do with out serious pain.  I must have strained something.  Lesson learned: Don't do 30 Day Shred in bare feet, you need ankle support. Also, I am realizing that my push up muscles are my weakest for whatever reason but my shoulders are pretty strong in every other exercise and I am using heavier weights for some of those.

Day 26:

Level 3: It's still hard to get through some exercises and I am always happy when she counts down to 5, 4, 3,2, 1.  Relief.

Day 27:

Day off, went to the beach.


Day 28:

Level 3: I will write an overview/summary of level 3 in my next post.

Sunday, October 3, 2010

30 Day Shred Week 3

Jillian Michaels - 30 Day Shred

Day 15:

Level 2 today slightly easy version because my bum shoulder and neck muscles were not feeling okay.   Thank God for A/C because I would not workout without it in the 105 degree temperatures we are having.

Day 16:

Level 2. Worked out with my 2 year old and it was distracting but interesting.  I won't be doing that much anymore.  :o)


Day 17:

Level 2: Barely got the workout in after the kids were in bed.  It's still hard especially the last 1/3.

Day 18:

Today was my chosen break day.

Day 19:

Still on Level 2 and afraid to try Level 3, though I did watch it to preview the pain.

Day 20:

Level 2: Did mostly the hard version of everything.

Day 21:

 Level 2: Its been a long day.  I might be brave enough to try Level 3 tomorrow. We'll see...